

ECLOUD / 05
Install Odoo in eCloud Apps
From the catalogue to your first sign-in: install the application and check access.
- Choose Odoo
- Configure access
- Deploy and verify
Arrows point to real controls. Enlarge any detail. Names and options may vary by version and account permissions.
Before you start
Goal: make an Odoo application accessible. Odoo is a business system; installing it does not automatically configure your company’s processes, users, permissions or modules.
- You need an authorised console account and an active AppCloud instance with available capacity.
- Agree the application name, company, administrator email and public or private access.
- Use a new password and store it in your organisation’s approved password manager.
This guide uses Odoo Community 19.0. Check the version and conditions in your account catalogue.
01 · Find Odoo in the catalogue
- Sign in to the eCloud console with your account.
- Open AppCloud → Aplicaciones (Applications) and select the instance that will host Odoo.
- Open Catálogo de aplicaciones (Application catalogue) and choose Odoo.
- Check you reached the Odoo form with Aplicación y acceso (Application and access) and Revisar y desplegar (Review and deploy).
- 01AppCloud
- 02Applications
- 03Select instance
- 04Catalogue → Odoo
02 · Complete the access details
- Instancia: verify the approved instance has enough resources.
- Nombre de la aplicación: choose a recognisable name that meets the field’s rules; illustrative example: inventory-demo.
- Nombre de tu empresa: enter the organisation using the system.
- Correo del administrador de Odoo: use an email controlled by the authorised administrator.
- Contraseña de Odoo: Follow the current policy; avoid password reuse.
- Acceso: choose Pública · HTTPS (Public) or private access as authorised. Private access needs eCloud’s specified connectivity, such as VPN.
- Dominio personalizado: optional in the example. The panel says leaving it empty assigns a domain automatically. A custom domain requires configuration checks with your administrator.
- Select Continuar (Continue).
You should see: an installation summary, before accepting deployment.
- Instance
- demo-apps
- Application
- inventario-demo
- Company
- Empresa Demo
- Administrator
- admin@example.com
- Password
- Set a unique password in your password manager.
- Access
- Public · HTTPS / Private · VPN
Continue opens the review; it does not deploy yet.
Acceso
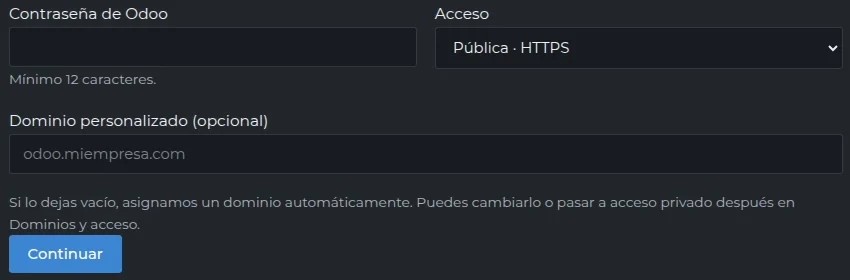
01Choose Pública · HTTPS or private access as approved. Use a unique password; your own domain requires checking DNS and the certificate.
nombre inválido

01Correct the name: lowercase letters, numbers and hyphens. Example: inventory-demo. Avoid spaces, uppercase letters and underscores.
03 · Review and deploy
- In Revisar y desplegar, compare application, instance and access type with your request.
- Read persistence, backup and service terms.
- If something is wrong, select Atrás (Back) and correct it.
- With authorisation, select Aceptar y desplegar Odoo (Accept and deploy Odoo) once.
- Watch progress and logs until the operation finishes. A newly created card does not mean installation is complete.
Deploy means preparing and starting the application. Completion time varies; this guide does not guarantee a deadline.
- Application
- inventario-demo
- Instance
- demo-apps
- Check
- Access, capacity, persistence and contracted backup policy.
Back: correct details. Accept and deploy Odoo: start installation.
Aceptar y desplegar Odoo
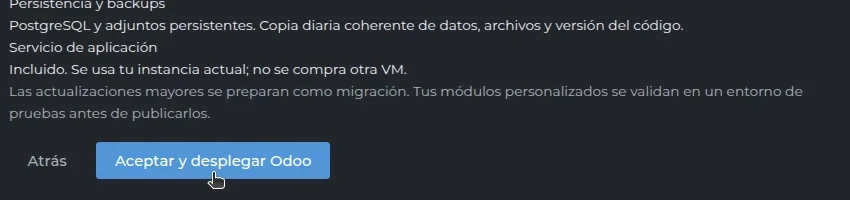
01Before selecting, also check name, instance and access at the top of the summary. Use Atrás to correct them.
Desplegando

01This does not yet mean En línea. Wait for the final status; do not deploy again or restart to speed it up.
04 · Check your first sign-in
- Wait for the final state on the application card and open its link.
- For private access, connect the authorised VPN first.
- Sign in to Odoo with the email and password set for Odoo; they may differ from the eCloud console credentials.
- Check that the application list or expected home screen appears.
- Before handing over the service, verify the correct company and coordinate users and permissions with its administrator.
Adding modules, migrating data and configuring business processes are separate tasks.
How public and private access differ
- Public · HTTPS
- Open the assigned address over the Internet. Odoo username and password are still required.
- Private · VPN
- First connect the device’s VPN profile; then open the private address shown by the console.
- Custom domain
- Coordinate DNS records and certificate before handing over the URL. Do not invent an IP or assume DNS is already configured.
Help and references
Available options depend on the service, version and your account permissions.
Request support ↗